

Well, the time has come to go snowshoeing. You have purchased (or rented) a pair of snowshoes and you are ready to hit the trails. Now what? Planning is one of the most important parts of outdoor recreation, so let’s go through how to get the most out of your trip:
Picking Where To Go:
Snowshoes are versatile and can be used in several different environments. Be sure to choose one that is realistic for your skill level. Here is a summary of some of the terrains I have tried:
• Flat trails: These are generally the easiest when first starting out. I would not pick a trail that is near your maximum hiking distance. Snowshoeing is strenuous and you will likely not keep your normal pace.


• Mountain Trails: This may not be the best environment to try them out if you are just starting. Adding in an elevation gain can make the workout far more intense. If mountain hiking is a struggle for you in warmer weather, this may not be a realistic starting point. If you do go up a mountain with snowshoes, be very careful along edges or on the summit. Conditions can be very icy at the top and no one wants to slide off the mountain!


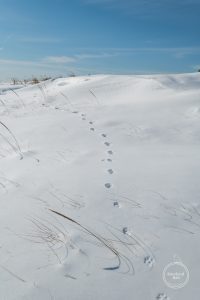
• Beach Trails: I have discovered that beach snowshoeing is a thing. Walking on sand is similar to walking in the snow under the right conditions, so this can actually be very useful. I actually found that “sandshoes” are a thing that exist in warmer climates. When I tried it, I intended to only use my shoes for the snow but it made the sandy portions much easier. Just keep in mind that sand will get into the crevices of your shoes. Just something to watch out for.


The Night Before:
It’s important to have all of your gear packed and ready to go before the morning of your trip. Rushing to pack the morning of increases your chances of missing something important. If you plan on using trekking poles, make sure they are in working order before hitting the trail. Check the forecast for the next day to be sure it is safe for exploring.
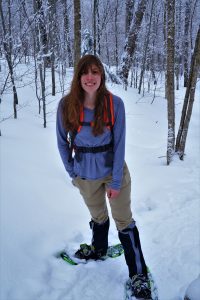
Be sure to pack several layers of clothing. I tend to get warm quickly so I shed layers and have to put them back on when I stop for a break. I typically bring a hat, some gloves, a down “puffy” coat and extra base layers. For pants I would recommend hiking pants +/- some fleece lining or snow pants depending on where you are and the weather. Tall wool socks are life savers as they keep your feet warm and dry quickly. Depending on the style of your snowshoe you can use winter boots or hiking boots. I tend to use winter boots as they are designed for the snow and stay warmer. Mine have rubber over the toes so the waterproofing is great. I also wear leg gaiters to cover the fabric portion of the boot and my pant legs. This is technically optional but I would highly recommend it.
Make sure to have a good dinner and get a good night’s rest. Snowshoeing can be a high intensity workout, so you want to have enough energy to get through the trail.
The Morning Of:
Check your pack one last time before heading out to make sure everything you need is ready. I would suggest eating a good breakfast before heading out. I usually prefer meals that are high in carbohydrates and or high protein. I also pack snacks like trail mix, jerky and cliff bars for some mid-adventure boosts. Bring more water than you would anticipate needing. The exertion can make you thirsty fast and dehydration can ruin your outing quickly. Please keep in mind that the water system you chose should account for freezing temperatures. Frozen water is not the best for drinking.
I also want to mention that you should be sure to get on trail fairly early. It gets dark faster during the winter and it is not advisable to be stuck on trail in the dark if you can avoid it. Be sure to pack a head lamp just in case the sun starts to set before you reach the trailhead.
On The Trail:
When you first get to the trailhead, be sure to grab any maps that may be available. If you are new to snowshoeing, I would suggest taking a few steps off to the side to get used to the difference in your steps. I would also suggest practicing turning as it can be cumbersome at first. Practicing how to get up after falling may also be helpful. Every person has their own way of correcting, so figuring out yours before you’re on trail will be helpful.
If the trail is multi-use, please try to avoid the area used by cross country skiers. Walking or snowshoeing along the ski path can cause indents in the snow (called “post holing”). This can be dangerous to the skiers as they can get caught up in the holes in the snow.
Once you get settled with the motion and have your bearings remember to have some fun! Getting out in the winter is one of my favorite ways to adventure. Remember to listen to your body and turn it in early if you need to.


The Night After:
Once you’re back home (or at your lodging if you had to travel), you will likely notice that your legs are sore. This is fairly common with this type of activity. Compression socks, topical ointments or over the counter NSAIDs can help with any muscle soreness. A massage gun may also come in handy if you have one. Be sure to rehydrate with either water or an electrolyte drink like Gatorade or Liquid IV. Eating a hearty meal is also advisable because you will have likely burned a high number of calories during your trip.


Kate, great tips for planning a snowshoe hike whether it be your first one or you are a seasoned snowshoe enthusiast.
A great informative article (great pictures as well).
Smart and helpful suggestions! I’m going tomorrow, and you’ve inspired me to get organized tonight. Happy Winter!